With a bit of time to spare over the holiday season I employed Arabiansquire to help me out in making a mess disguised as a gaming terrain project. We've been needing some generic rubble bases for a while now, and a couple of small test pieces I made last year came out OK, so time for some more...
 |
| The raw materials |
The material used were:
Old CD for a base
- cardboard
- sand
- gravel (2 different small grades)
- old mosaic tiles scavenged from a vandalised artwork (not by me I must say)
- white glue
- mixing cup and lolly stick
The process was pretty (ie very) simple.
- First glue some cardboard over the CD hole (Obviously not a step needed if you aren't using CDs)
- Put some of the largest rubble material in the mixing cup, pour in a good amount of glue, mix so that everything is covered, scoop out onto the CD and arrange as desired
- repeat step 2 with smaller rubble and continue until you finally use the sand
- make sure to texture the edges of the cd/base with sand
- leave to dry (in my case Scottish winter and over-exuberant gluing meant around 5 days)
 |
| Ready to dry |
Paint black
Dry brush dark grey and an earthy brown
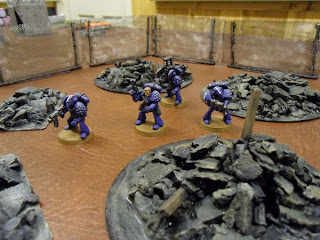 |
| Space Marines patrol the ruins |
All done and ready to play. As you can see from the pictures I also added a couple of bits of sprue in. Originally they were going to be painted as mteal girders, but I later changed my mind and used brown to allow for fantasy ruins as well.


Great idea. Thanks.
ReplyDeleteVery nicely done and easily stored too i would imagine
ReplyDeleteClever chap!
ReplyDeleteThanks guys. And yes they do store easily. A combination of being quite flat and a high percentage glue means they can just be piled in a box no worries.
ReplyDeleteClever stuff.
ReplyDeletecheers Irqan :)
ReplyDelete